Getting Started RVTs & Ultrasound: Knobology

In the last few editions of Heska Elevate, convincing arguments are made for veterinary technicians to take an active role in performing ultrasound exams. Full abdominal scans are time consuming. Having an RVT capturing diagnostic images to be interpreted by a veterinarian or veterinary radiologist, will free up veterinarians to do the things they are required to do, while enriching the careers of their technicians.
Ultrasound machines available for veterinary use today have amazing image quality, making ultrasound a little less daunting to learn. Although learning to capture representative images does take time and commitment – it is certainly very doable.
Heska offers both online and in-person ultrasound courses which are open to both veterinarians and veterinary technicians. Most recently, By Technicians, For Technicians courses have been offered and have been very well attended. By the end of each weekend, course participants were well on their way to being able to master the art of abdominal scanning.
But if you have not yet had the opportunity to take part in a course, don’t be afraid to try your hand at scanning, especially if your hospital’s machine is gathering dust in the back corner… we all have to start somewhere! Here are a few tips to get you started and to help navigate the process of acquiring diagnostic images:
All machines – no matter the brand – have the same basic set of buttons/knobs. The four most important ones are Depth, Frequency, Focal Zones, and Gain. Let’s have a look at how each one will help you capture the best images:
Depth
The depth button allows the user to adjust the depth at which the ultrasound is interpreting the sound waves. The organ of interest should fill at least half of the viewing screen for optimal analysis. A cm scale can be seen on the monitor to indicate how deep into the abdomen the monitor is showing. For example, when examining a cat’s kidney that is only 3-4cm deep into the abdomen, the depth of view should be set to 4-5cm, so that the kidney fills most of the screen. If the depth is set to 12cm, the kidney will appear as a small structure at the top of the image.
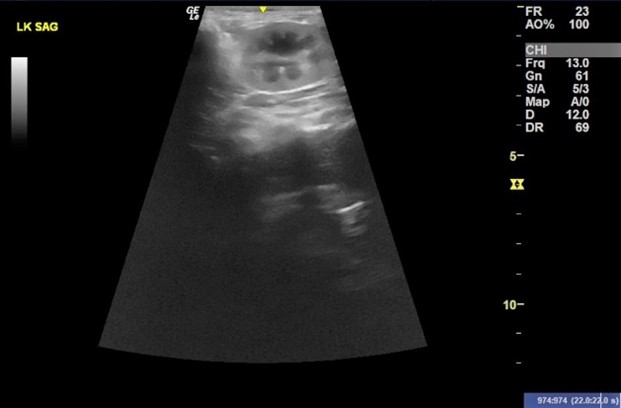
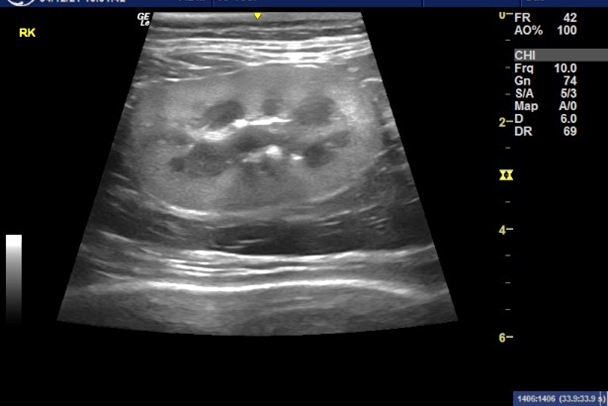
The image on the left has a depth setting of 12cm and the image on the right has a depth setting of 6cm, as indicated by the cm scale seen to the right of the image. The area of interest should fill most of the viewing screen for best analysis.
Frequency
The frequency used depends primarily on the depth of the anatomy of interest. High frequencies have short wavelengths and, therefore, cannot penetrate very deeply. Low frequencies have long wavelengths and are able to penetrate deeper into tissue. The higher the frequency, the higher the resolution. The inverse is also true, whereby the lower the frequency the lower the resolution. Therefore, it is recommended to select the highest frequency (for best image) that will penetrate to the depth needed. For example, a lower frequency may be necessary to visualize the dorsal-most aspect of the liver in a large dog. The image will be a little grainier in appearance, but that is the compromise that must be made to see the entire liver in that animal.
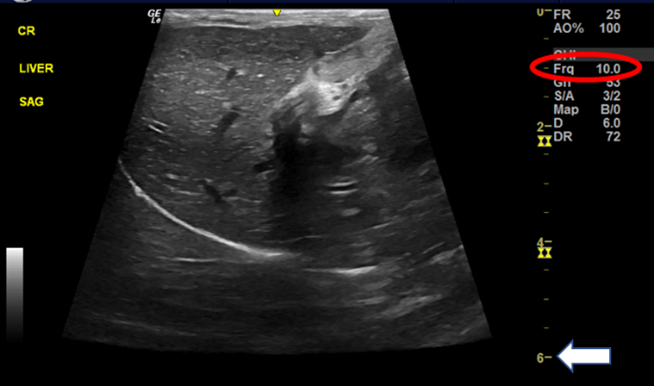
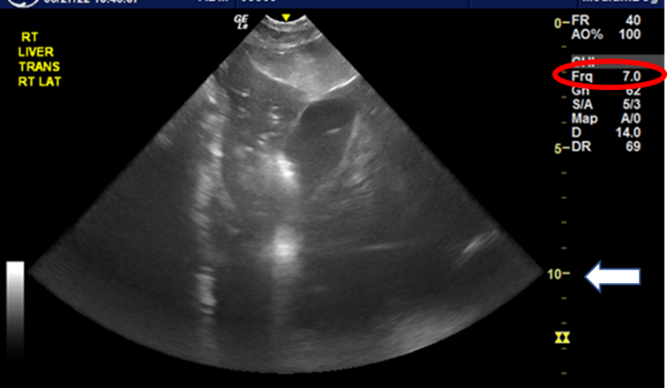
The image on the left is of a cat’s liver, produced using a frequency of 10MHz. Note the depth of image is 6cm. The image on the right is of a Great Dane’s liver, produced with a frequency of 7MHz. The image is not as clear as that of the cat’s liver because fewer echoes are being returned to the transducer. A higher frequency, however, would not have been able to penetrate to the 10cm depth.
Focal Zones
To improve image quality, the ultrasound beam can be narrowed (focused) at different depths of imaging. Narrowing the beam enables more echoes to be returned from the focused area, resulting in higher resolution of the image at that depth. Focal zones are most often represented by small triangles at the side of the image and should be adjusted to sit at the level of the anatomy of interest.
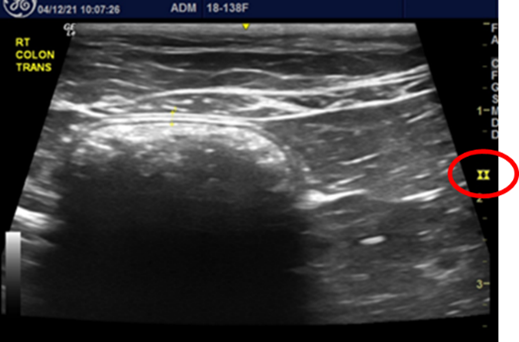
In this image of the colon, the focal zones are represented by the two yellow “hour-glass” shapes to the right of the image. By setting them at the level of the colon, details of its wall are crystal clear.
Gain and TGC
 The gain setting allows the user to adjust the overall brightness of the image – similar to adjusting the brightness on a cell phone or computer monitor. It is adjusted to the user’s preference.
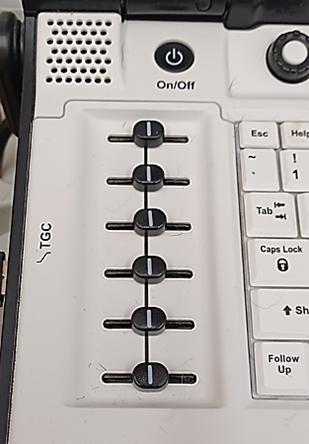
In addition to the overall gain, ultrasound machines can also adjust the brightness level at different depths of the image, using the TGC (Time Gain Compensation) sliders. In “the old days” the TGC was adjusted frequently to compensate for weakened (attenuated) echoes returning from the deepest areas of the patient. These weak echoes resulted in the far-field (bottom) of the image being darker than the mid and near-field. By increasing the “volume” of those deep echoes, the image becomes uniformly grey from top to bottom.
Today’s ultrasound machine technology compensates for attenuation of the beam, and users rarely need to adjust the TGC sliders. Most of the time, they should be in a vertical line in the middle of the slide.
TGC Adjustment Sliders
In summary, the adjustment of Depth, Frequency, Focal Zones and Gain will help create the best images for your ultrasound exams. All machines have these “buttons” – they can be easy to find, or you may have to open sub-menus to find them – but they will be there. By practicing the adjustment of these four settings, you will quickly learn how to improve your images. Good luck and let’s get scanning!